How to Tighten a Honda CRF450 Chain and Adjust Tension
BraapAcademy.com earns a small commission from qualifying purchases.
This does NOT cost you extra.
Contents
Tightening the chain on your Honda CRF450 dirt bike might not be the first thing you think of when heading out to the garage to load up your bike and head to the trails. However, we all know it’s important to check and tighten a CRF450 chain regularly.
The Honda CRF450 chain needs to be inspected (and possibly oiled) after every 2.5 hours of riding. Maintaining the correct chain-tension on your CRF450 will prevent damage to the bike or harm to you, the rider.
There are various reasons as to why you need to tighten or adjust the chain, including the obvious reason that if you don’t, it will fall off or snap. The snapping is the serious part. You could crack your motor case or similar if your chain snaps – not cool.
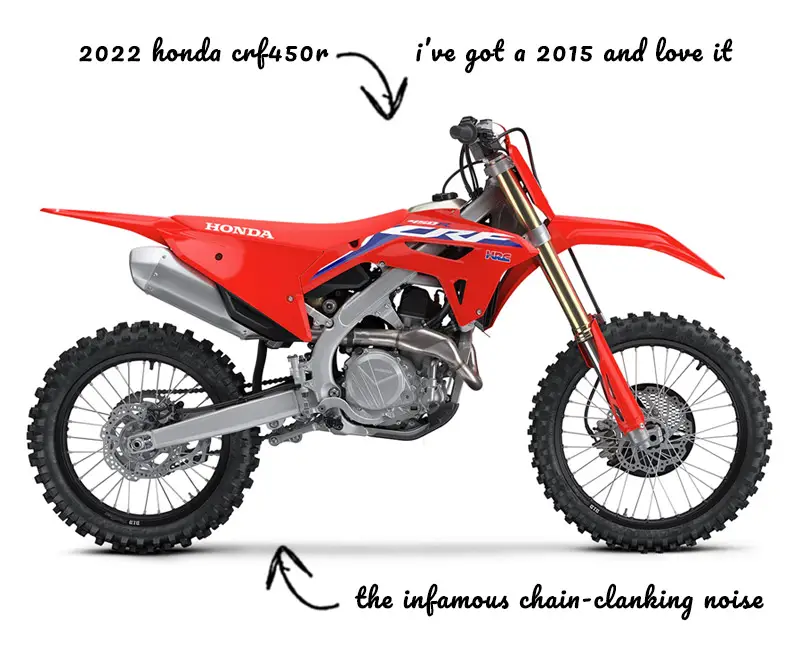
Also, and as much as I do love and own Honda dirt bikes, they’re infamous for that chain clanking noise.
The bad news? That’s not really going away. My best advice is to get a good chain (I like D.I.D.) and learn to live with it. Your other option is to simply tighten the chain a little more than you actually should… however, I really don’t recommend that because it’ll just wear out the sprockets and chain quicker. Oh, and the clanking noise will still not go 100% away.
Tools to Tighten a CRF450 Chain
Here is a list of tools (some mandatory, some not) for the job:
- Exhaust Plugs (keep dirt & water out)
- Degreaser
- Grunge Brush
- Dirtbike Stand
- Large Crescent Wrench (or proper size wrench for your bike)
- Small-Medium Crescent Wrench (preferably just the proper size wrenches – most-likely a 12MM & 10MM)
- Chain Lube
How to Clean a CRF450 Chain (do this before tightening)
There are a few steps to follow to tighten your dirt bike chain correctly – the process is pretty straightforward.
The very first thing to do is wash your Honda CRF450 dirt bike and chain. Being caked with dirt, oil, and other unwanted materials isn’t going to help anyone and it can make it a messy job. Having a clean bike chain (and bike) will help it to last longer and work better too.
Ok, now we’re ready to start!
Grab your degreaser and a grunge brush (if you’ve got one). You will then need to set your bike up on a stand so that the rear wheel is entirely off the ground.
Spray down the chain with the degreaser and work away any debris with the brush. You’ll want to basically use the brush in one location and turn the rear wheel to rotate the chain all-the-way through. It make take more than one pass.
After you’ve cleaned away all of the debris on the chain, let it dry off completely and then apply the chain lube.
NOTE: Neither a wire brush or a degreaser is recommended if you have an O-ring chain.
With a clean and lubed chain, we’re ready.
Steps to Tighten a Honda CRF450 Chain
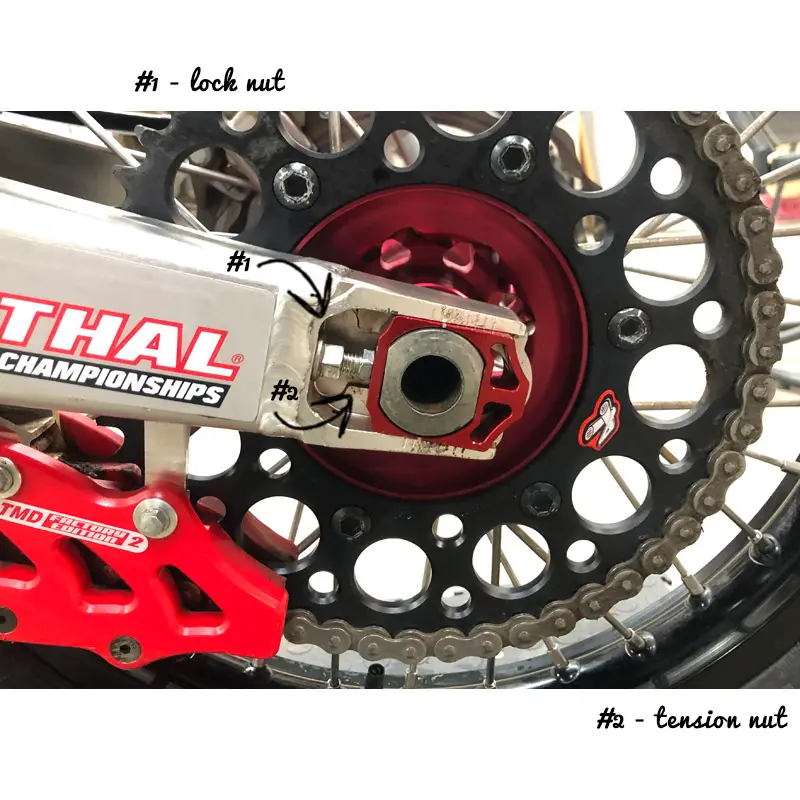
Step #1 – With the large crescent wrench, loosen the nut on the CRF450’s axle; it can be located on either the left or the right side depending on the bike. You will need to loosen it so that it turns with no tension.
Step #2 – Take the 12MM (or whatever size you need) wrench and loosen the lock nuts, which are against the swingarm. Loosen both sides.
Step #3 – With a wrench, turn the tension bolt out until the CRF450 chain feels correct (details in step #4). You will need to do the left side first because you are adjusting the chain. If you were to adjust the right side first, you would then have to make multiple adjustments later on.
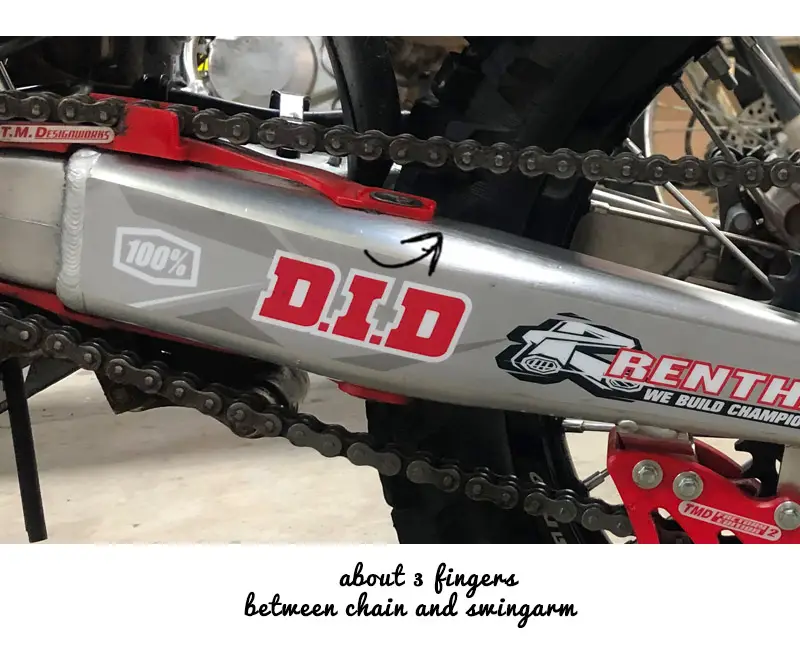
Step #4 – Measure chain slack. The correct chain slack for a Honda CRF450 is 1 – 1.25 inches at the end of the chain guide. An accurate way to see if it is correct is to put 3 fingers between the chain and the swingarm, right at the end of the chain guide. The chain and swingarm should be pressing on your fingers. If this is the case the chain has been tightened properly.
Step # 5 – Repeat for right side. Once the CRF450 chain has been tightened enough on the left side, you will then need to do the same on the right. There will be marks located on the axle blocks, and on the swingarm, you will need to adjust the right side so the notch is in the same position as it is on the left. If it isn’t, it will result in the wheel not spinning straight and could damage the bike or even result in an unwanted crash.
Step #6 – Make sure everything is tightened down – lock nuts & axle nut.
Once you have finished these steps, you are ready to go.
Sort of…
Step #7 – Yes, technically that is all it takes to tighten a Honda CRF450 dirt bike chain, but you really need to lube it up afterwards as well. Keeping the chain greased is important. If you didn’t clean and lube the chain already, then just grab a good chain lubricant (this set makes it easy) and apply as described in the instructions.
Ok, now you’re done!
Step-by-Step Video Instructions

Chain Maintenance
As outlined in a proper maintenance schedule, make sure that you are checking the bike chain over and cleaning it regularly. Also, this will ensure that no debris is in the chain, as this could cause an accident or harm the bike.
If you look after your dirt bike chain, it will result in the chain having a longer working life, and will also save you money as you won’t need to replace it as often or pay for any damages.


