How to Winterize a Dirt Bike (2 Strokes, 4 Strokes, Carbureted, Fuel Injected)
BraapAcademy.com earns a small commission from qualifying purchases.
This does NOT cost you extra.
Contents
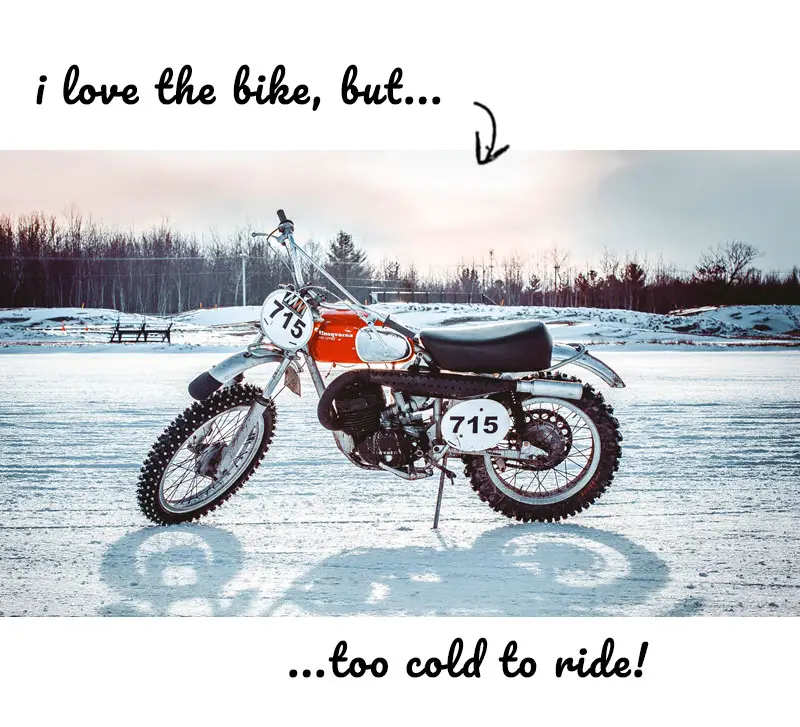
Preparing your bike for winter can make a big difference once it comes time to ride again. If you’re one of the unlucky fellas that have to store your motorcycle for the winter, knowing how to winterize a dirt bike properly will make your job easier.
Winterizing a dirt bike really is simple and it makes starting out the next riding season much easier.
Depending on how much work you want to put into this, and exactly where you’re storing your bike, you can cherry-pick which of these items you do. However, I do recommend that you do all of them, if possible.
The only specialty tool that you might need is a dirt bike torque wrench if you’ve got one. If not, you don’t HAVE to have one, but it is a good idea to consider getting one eventually.
Winterizing a Dirt Bike
Start with a clean dirt bike. If this means that you didn’t wash your bike after you rode last, you need to before storing it for winter. Leaving dirt, mud, pine needles, leaves, etc. on your dirt bike all winter is not a good idea.
Assuming your dirt bike is clean, here’s how I winterize my dirt bike.
Clean Air Filter
Again, if your air filter wasn’t cleaned after the last time you rode, you’ll want to do so now. If you’re wondering, I do have an article on how to clean an air filter on a dirt bike that makes it quite easy.
If you leave the dirty air filter on your dirt bike all winter it’s going to be much harder to clean when you go to do so. All of the dirt and oil will really soak into the air filter foam. Not fun to clean.
Winterize Fuel System
Okay, so now that you know the air filter and dirt bike overall need to be clean, one of the main things you must do to winterize a dirt bike is to prepare the fuel and fuel system. Here’s how to do so:
Fill Tank With Non-Ethanol Fuel
If you’re like me and only use non-ethanol fuel for your dirt bike gas, simply fill the tank and move on to the next step.
If you are using an ethanol blend, you should drain all of the fuel and then refill the tank with non-ethanol fuel. Also, you should think about not using ethanol in your dirt bike. Ethanol is bad for dirt bikes, and other small engines. Especially carbureted ones.
Leaving ethanol-blended fuel in your tank and lines is not a good idea. This type of gas generally breaks down after 4-6 weeks and doesn’t need to be sitting in your bike all winter long.
Additionally, filling your fuel tank up, as opposed to draining it, leaves no room for air or water.
Treat the Fuel
Treating your fuel is simple. All you have to do is purchase a fuel stabilizer for your dirt bike and pour it into the tank. And it doesn’t take much.
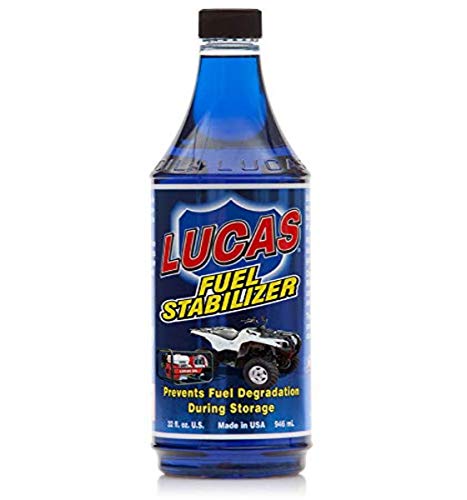
If you use the Lucas fuel stabilizer, for example, it only takes one ounce to treat one gallon. Most dirtbikes have close to a 2-gallon gas tank. That means if you were to pick up a 1-quart bottle of fuel stabilizer for about $16, you could treat each full tank of fuel for about $1. (It would actually cost less than $1/tank because the stabilizer is a little less than $16.)
Even though it is cheap, a good fuel stabilizer will prevent the breakdown of fuel during storage. It also cleans, lubricates, and maintains the fuel pump, carburetor (or fuel injectors), and compression rings. Plus, you can use the Lucas Stabilizer (and other brands) on a 2-stroke and 4-stroke engine. Click here to view pricing and read reviews of the stabilizer on Amazon.
Run for a Few Minutes
Once you have removed all of the ethanol-containing gasoline and replaced it with the good stuff, we’re ready to move on. Now it’s time to start your dirt bike and run it for a few minutes.
For this step, the goal is to warm up the oil for one of the next steps and to distribute all of the treated fuel throughout the fuel system. It’s important to ensure that you don’t leave any untreated fuel in the lines.
Turn “OFF” Fuel
Find the fuel switch and turn it to the “OFF” setting.
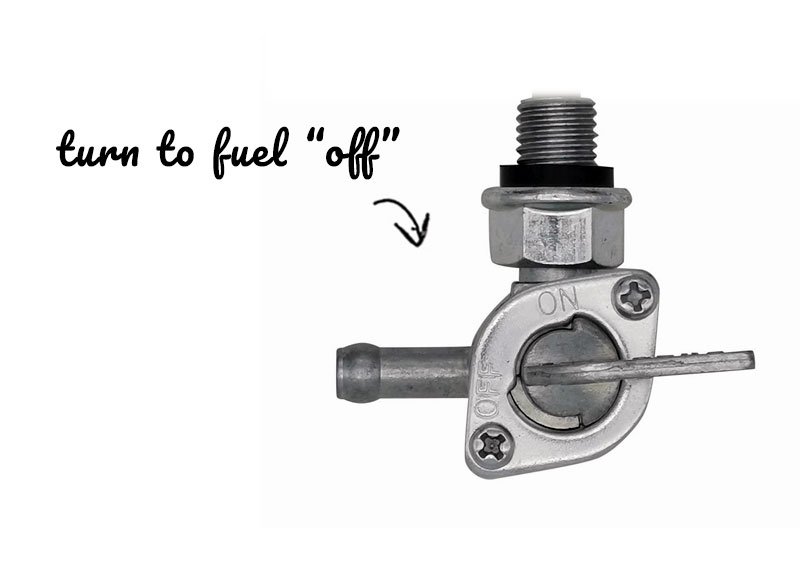
With the gas turned off, you’ll want to start and run the bike to use up any fuel that is already in the carburetor. Basically, just run it until it cuts out and dies.
NOTE: You can wait to start and run the bike until after you change the oil. I only listed it here, above the oil change, because it makes sense to be listed with the other steps on how to winterize a dirt bike’s fuel system.
Change the Oil & Filter
While the dirt bike and its oil are warm (not hot), it’s time to change the oil and oil filter.
Changing out the oil before you store your dirt bike for winter is a wise thing to do. You really shouldn’t leave old, dirt oil just sitting in your dirt bike. So, do the work now and you’ll be ready once spring rolls in.
For a step-by-step explanation of how to change the oil and filter, check out this dirt bike oil change article which also covers how often you should be changing your oil.
Lube the Chain
As you would typically do after washing your dirt bike, you need to lube the chain. If you leave the chain unlubed all winter (especially after washing your bike), the chances are high that your chain will have rust on it in spring.
Therefore, whether you’re going to winterize a dirt bike or not, you should always keep up on chain maintenance. Here’s an article that goes into detail on how to tighten a chain on a dirt bike and how to lube it properly.
At the end of the day, you don’t always have to use the best dirt bike chain lube to get the job done. As long as you keep it lubed, it will help to protect your dirt bike chain.
Remove the Battery
If your dirt bike has a battery, it’s best to remove it during winter. Leaving a battery connected will allow it to slowly drain. Once fully drained, the battery is usually ruined and will not work. If it does work, it won’t hold a charge or work as well as it used to.

With that in mind, it’s always a good idea to disconnect your battery and connect it to a battery tender. If you are looking to pick up a good tender, here’s the best battery tender for quads and dirt bikes… and I even use mine for my riding lawnmower.
Top Off With Antifreeze
Since you’re prepping your dirtbike for winter, it’s important to make sure that you’ve topped it off with antifreeze.
There are many different types of dirt bike antifreeze out there, so just make sure to pick a good one. And definitely, do not simply put water in your radiator and think that’s good. It’s not, and you risk the chance of the water freezing and cracking parts of your cooling system.
Check Tire Pressure
Checking the tire pressure is one of the items that gets overlooked often when people go to winterize a dirt bike. While it isn’t the most important item on the list, ensuring that your dirt bike tire PSI is set properly during the winter is a good idea.
Put on Stand
With your dirt bike almost ready to be stored for winter, it’s time to place it on a good stand. Even if you have a kickstand, you’ll still want to let your bike rest on an actual stan. I have a dirtbike lift stand that I use that works great.
Not only does putting your bike on a stand help to keep all of the fluids level, but it also relieves pressure on your suspension and tires.
Cover and Store
Storing your motorcycle is pretty straightforward. If you have a garage, you’re set. If you don’t have an indoor spot for your bike, I recommend getting a cover or storage tent. They do make some pretty cool options like this portable motorcycle garage and a few other tents you can put your bike under.
Fuel Injected VS Carbureted Dirt Bike
If you have a newer, fuel-injected dirtbike, you’ll still want to address the fuel system.
Just like with a carbureted bike, you should drain any ethanol fuel from the system entirely, and add non-ethanol fuel. In addition, add the proper amount of fuel stabilizer, run your bike for a few minutes (to distribute treated gas throughout the fuel system) and you should be good to go.
Other than that, the steps to winterize a dirt bike don’t really change much. Whether you’ve got a 2-stroke to winterize, or a 4-stroke, you should be able to follow the above steps.


